Assign Group to Invoice Lines
This popup window lets you organize the lines of a Halo recurring invoice into named groups. A group visually groups several related lines together (for example, all licenses for the same service) within the invoice, using a numeric iden...
Last updated 24 days ago
This popup window lets you organize the lines of a Halo recurring invoice into named groups. A group visually groups several related lines together (for example, all licenses for the same service) within the invoice, using a numeric identifier and a descriptive name. It opens from the invoice detail screen (Display Invoice Halo) after you select one or more lines.
When to use this screen
- When you want to group several selected lines under a group heading that already exists on the invoice.
- When you need to create a new group to classify lines that do not yet belong to any group.
- When you want to correct or rename the name of an existing group already used on the invoice.
To open this window you must first select at least one line in the invoice grid. If you don't select any line, the system will warn you with the message "No records selected" and will not open the dialog.
What it shows
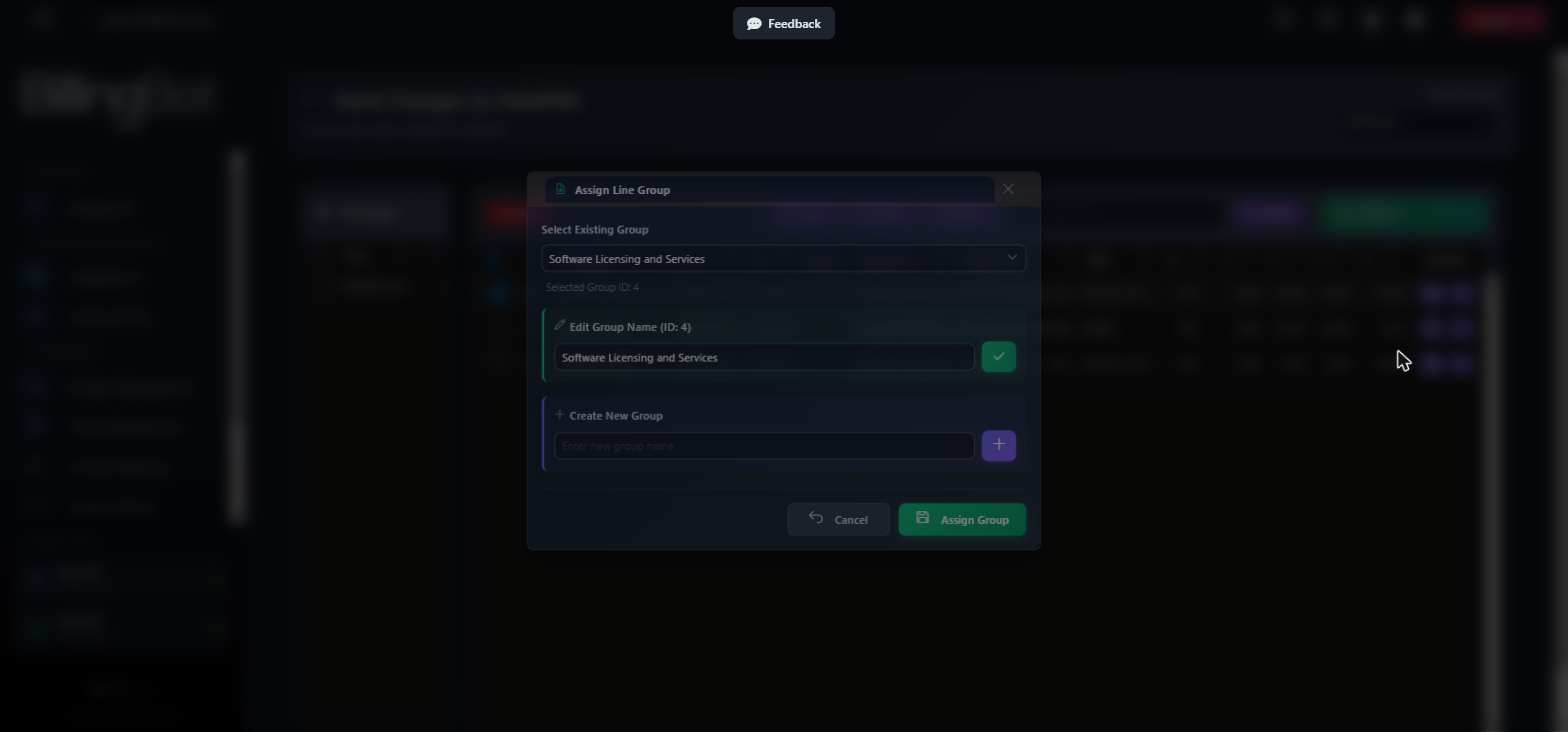
Available actions
- Check icon (✔) next to Edit Group Name: saves the new name you typed for the selected existing group. If the name matches that of another already created group, you will see the error "A group with this name already exists" and the change will not be applied. This name change remains pending until you click "Assign Group".
- Plus icon (+) next to Create New Group: enables the text field to type the name of the new group. Clicking it again (now shown as a check icon ✔) confirms the creation of the group in the list and leaves it selected. If the name already exists, you will see the error "A group with this name already exists".
- "Cancel": closes the window without applying any changes to the invoice lines.
- "Assign Group": applies the selected group (existing, edited, or newly created) to the lines you had selected in the grid, and also updates the name on all other queued lines that already belong to that same group, to keep the name consistent. ⚠️ This action saves the changes to the database immediately (it is not a preview); once confirmed, the lines are left with the new group assigned. Only lines that are still queued change: lines already sent to HaloPSA keep their group, and the message tells you how many were left as they were. It is refused while a send to HaloPSA is running.
Step-by-step flow
- On the invoice detail screen, select one or more lines in the grid that you want to group.
- Open the "Assign Line Group" window.
- Choose one of these three options:
- Select an existing group from the "Select Existing Group" drop-down list.
- If you choose an existing one and want to correct its name, edit it in the "Edit Group Name" field and confirm with the check icon.
- To create a new group, click the (+) icon in "Create New Group", type the name, and confirm with the check icon.
- Verify the group name and ID shown in the informational texts.
- Click "Assign Group" to save the group on the selected lines and on all related lines that share that same group.
- Wait for the confirmation message indicating how many lines were updated.
Common errors and how to resolve them
Related screens
Was this helpful?
Still need help? Ask the team